How To Use Virtual Instruments In Logic Pro
Sep 30, 2023
In this day and age, creating music is easier than ever. While musicians and artists had to go to a professional studio full of analog gear to record a piece, nowadays virtually anyone can make songs using a computer in the comfort of their homes.
A couple of decades ago, recording an instrument meant going to an acoustically treated room and using various top-notch microphones to capture the sound. But today, almost all the instruments can be emulated digitally. What’s more, digital software allows us to create sounds that previously weren’t possible even with the most advanced analog synthesizers.
Knowing how to use virtual instruments is an inseparable part of music production. Apple’s Logic Pro has an amazing reputation for having high-quality stock sounds and software instruments. It is only one of the reasons that Logic ranks among the most popular Digital Audio Workstations (DAWs) in the world.
In this post, I will show you everything you need to know to get started to use virtual instruments in Logic Pro.
Getting Started: Adding A Virtual Instrument Track
Generally, there are two ways to capture audio tracks in Logic: A) using a microphone or an instrument cable through an audio interface and B) using software to trigger sounds. We’re focusing on the latter in this post.
Let’s begin from scratch. Open a project in Logic Pro and follow these steps:
- Click the “+” button on the top-left corner of the track header area to create a new track.
- Choose “Software Instrument” as your track type and click “Create.”
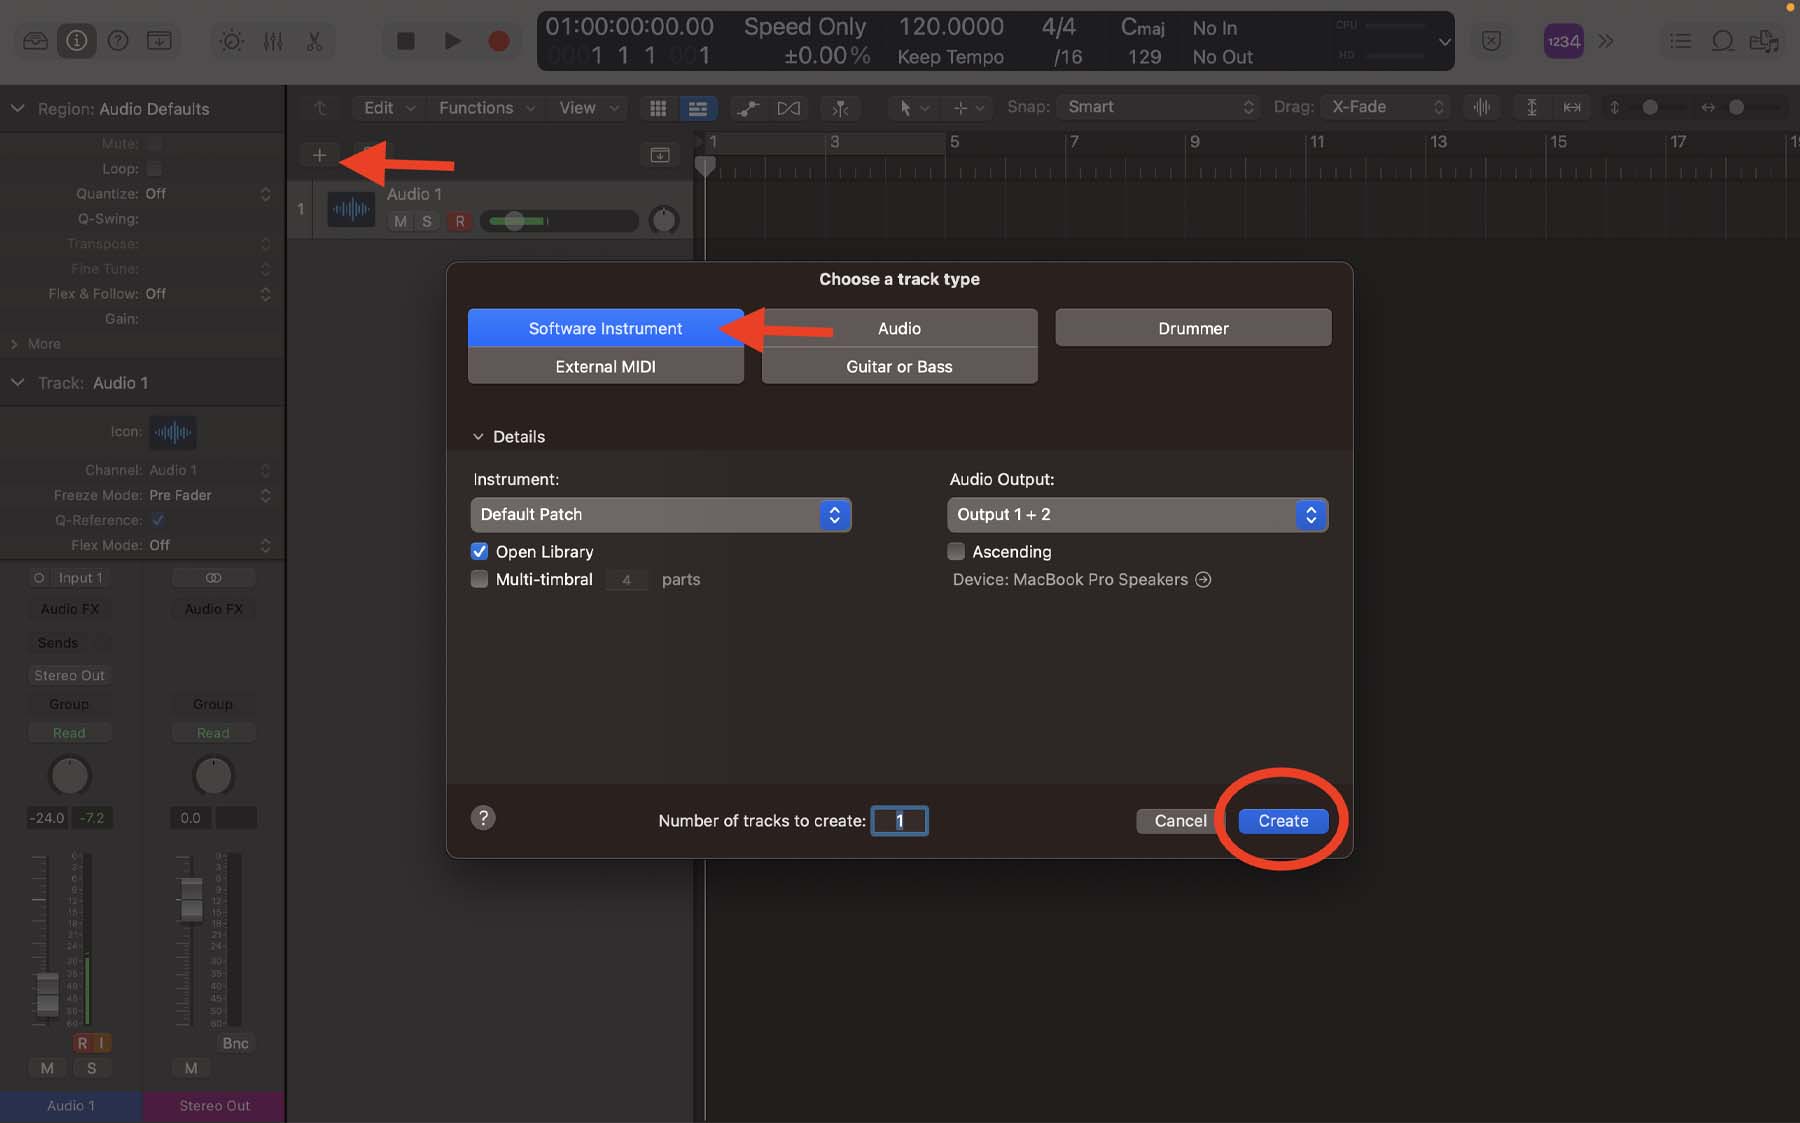
By default, Logic will load “E-Piano” as the virtual instrument for your new track, which we can change later on.
Now, let’s explore how we can trigger different notes of our software instrument track.
Playing Virtual Instruments In Logic
Logic offers various approaches for implementing virtual instruments in your projects. One way is to treat virtual instruments as MIDI. Standing for “Musical Instrument Digital Interface,” MIDI is a sort of language that sets different parameters for adjusting the sound of your software instrument track. These parameters include note pitch, length, velocity, sustain, and essentially any other variable that you can control via a knob or a fader. There are three ways you can play MIDI notes in Logic:
- Using the editor menu
- Using a MIDI keyboard controller
- Using Logic’s Musical Typing feature
1. Using the editor menu: You can use Logic’s editor menu to add notes from a piano roll to the grid. It’s one of the most popular ways of creating and editing MIDI as it allows you to apply adjustments with surgical precision. Later on, when you gain more experience, you’d want to use the editor menu frequently to make your MIDI tracks sound more natural.
- Press “E” on your keyboard to open the editor menu.
- Click the left-click tool menu from the top-center of the editor menu and change it to “Pencil Tool.”
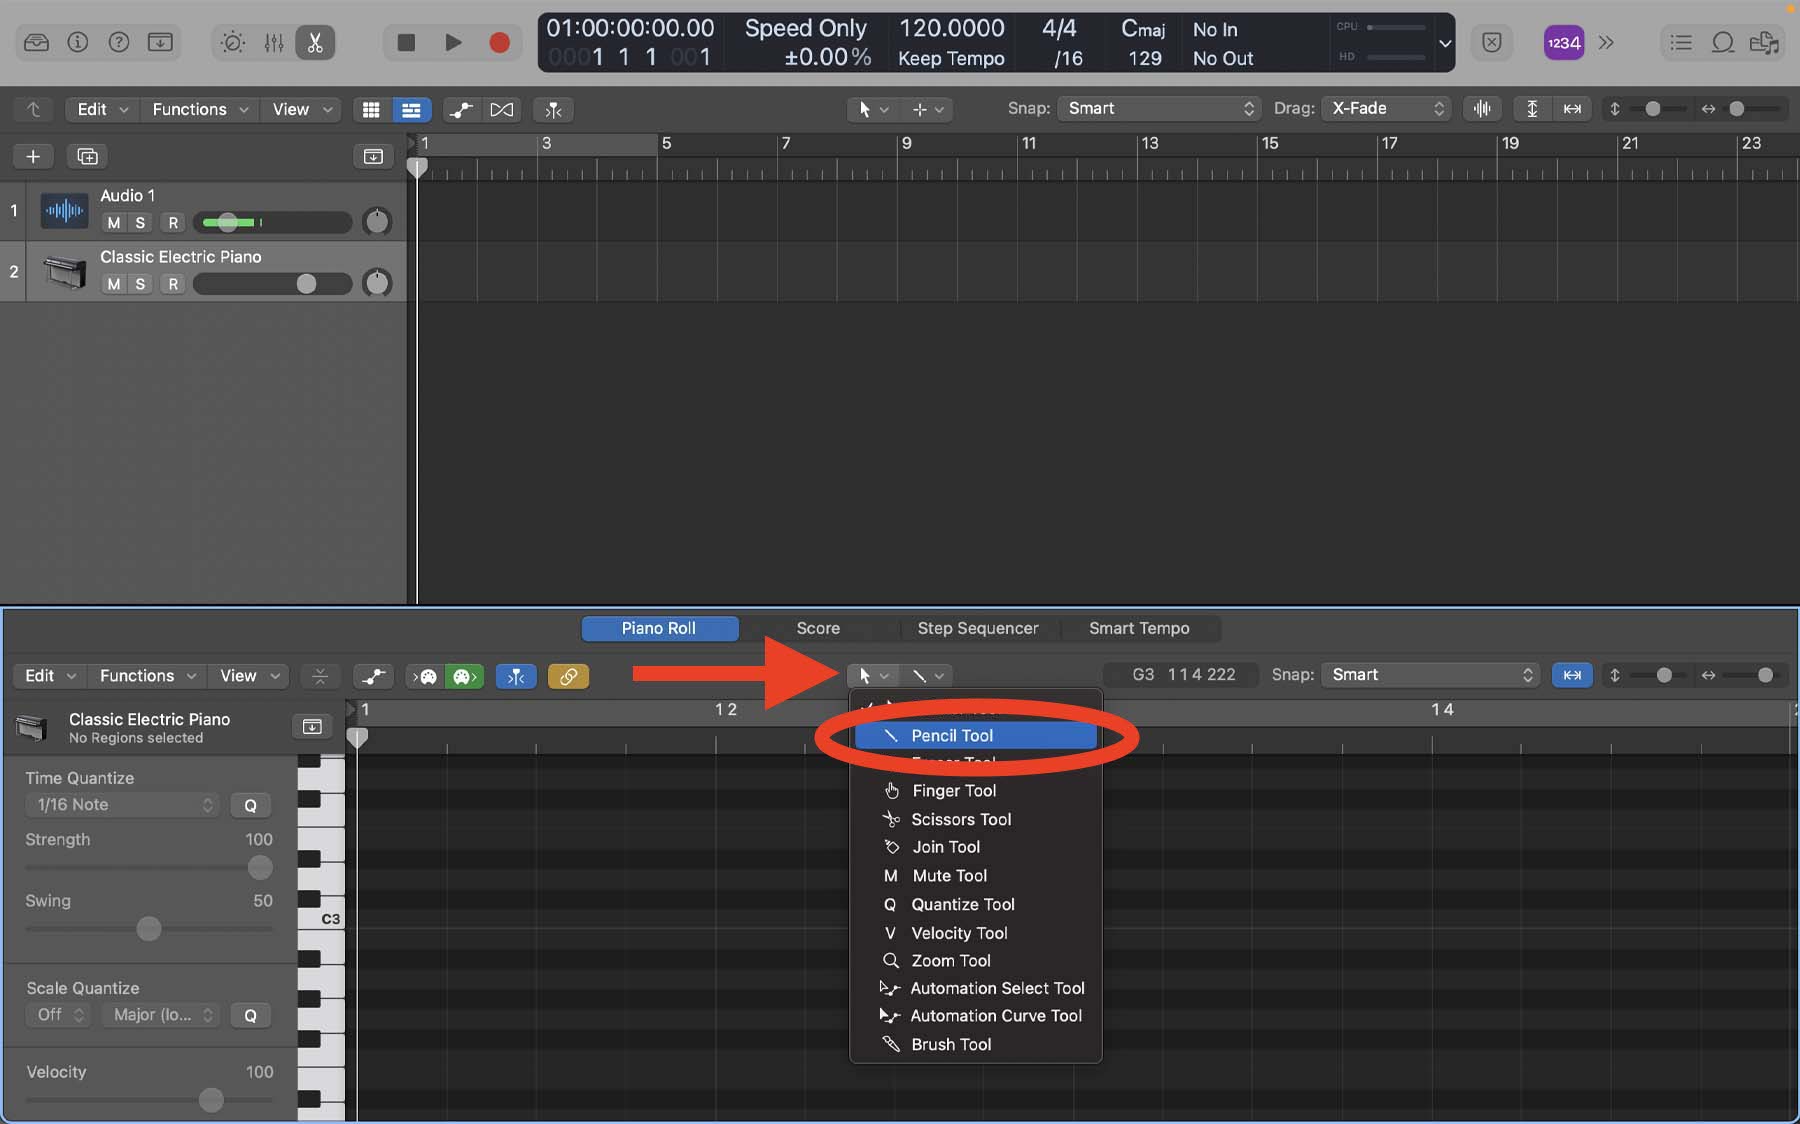
Now you can use your mouse or trackpad and create notes by clicking on the grid. You can later change the position of each note by dragging it across the grid or adjusting the length by clicking and dragging one of the note’s ends.
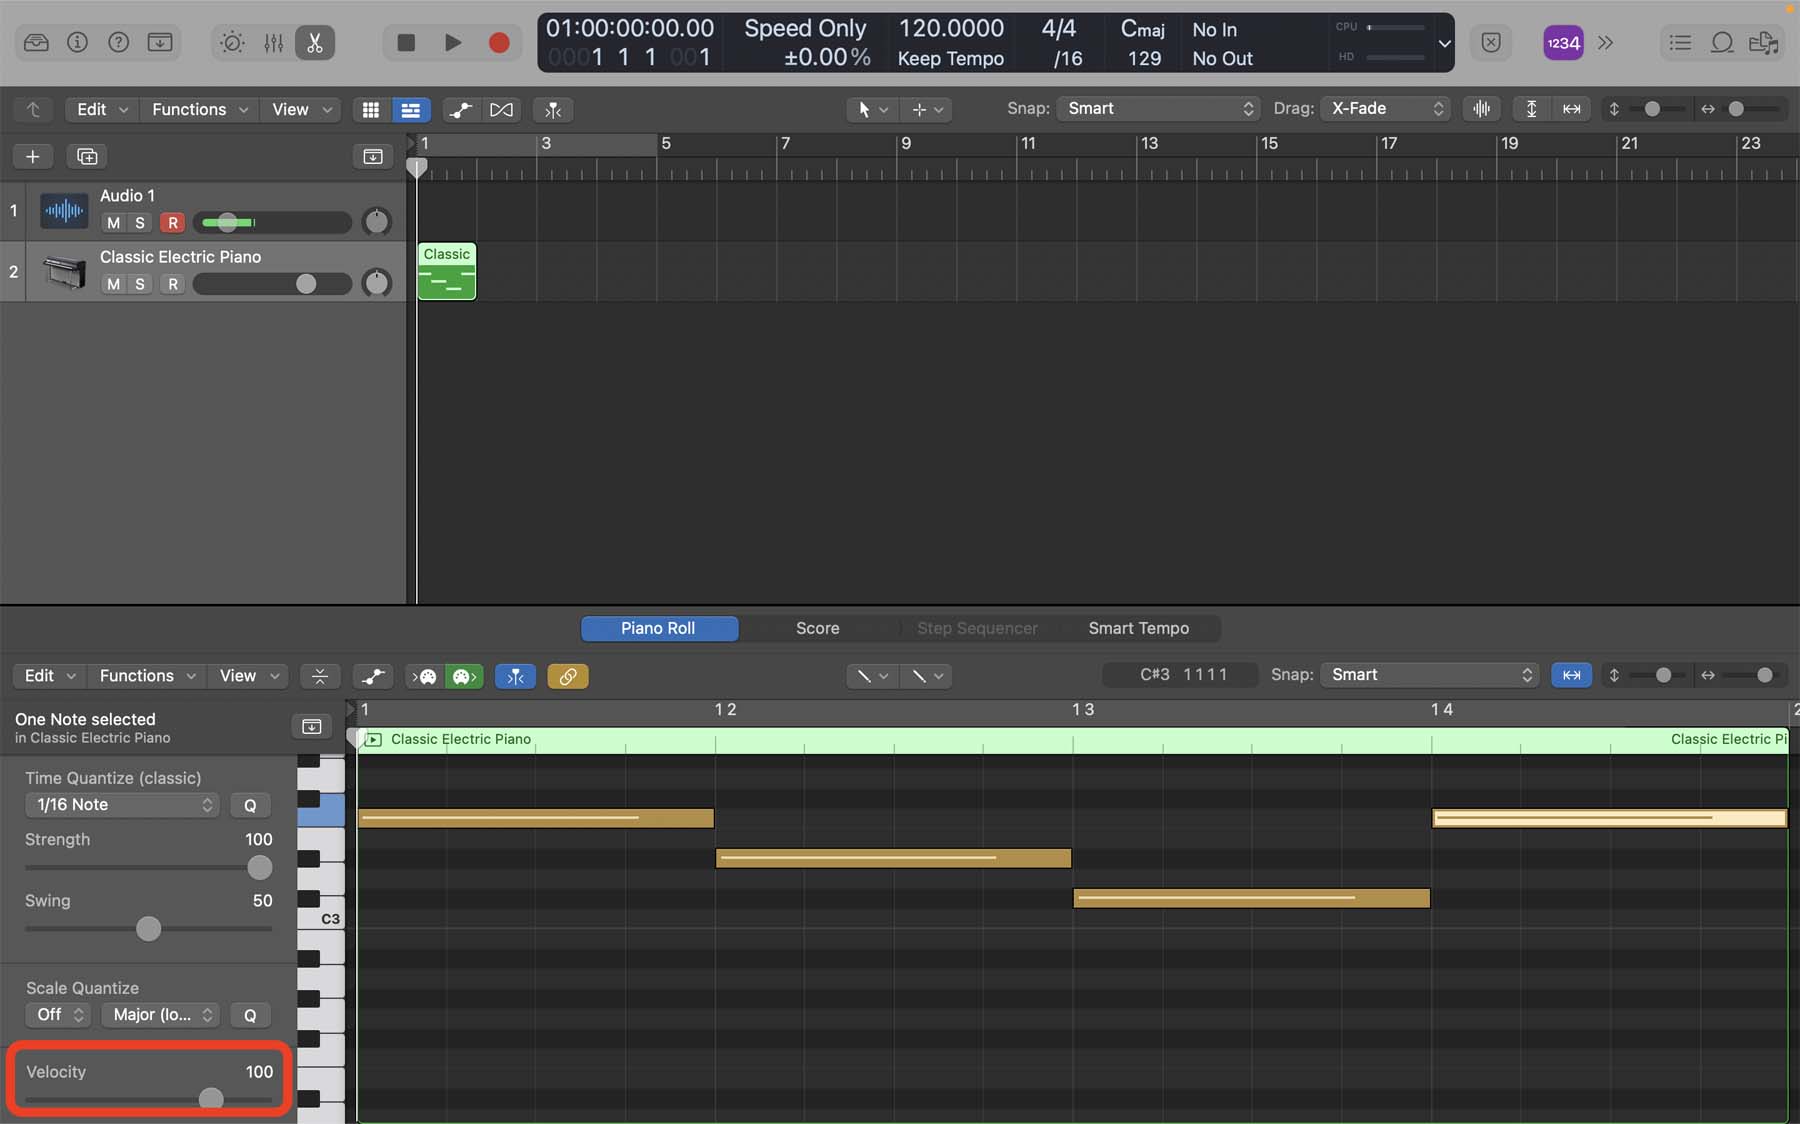
As you can see from the screenshot above, all notes have a yellowish color. The color of each note determines its velocity. You can adjust the velocity by moving the fader on the top-left corner of the editor menu.
2. Using a MIDI Keyboard Controller: one of the most common ways of playing virtual instruments is via a MIDI keyboard controller. Typically, MIDI keyboards have a piano-like layout that allows you to trigger notes. The more advanced models usually come with velocity sensitivity, aftertouch, weighted keys, and various knobs and faders that you can program to control different parameters.
Once you connect your keyboard controller to your Mac, Logic automatically detects it and allows you to use it right away. If you have trouble connecting your MIDI keyboard to Logic, check out my step-by-step guide on how to connect your MIDI controllers to Logic Pro.
3. Using Logic’s Musical Typing feature: If you don’t have a MIDI controller around you, Logic allows you to use your computer keyboard as one to trigger notes. Needless to say, you can’t control pressure-sensitive parameters like velocity when using your Mac’s keyboard, though you can later adjust them in the editor menu.
To open the Musical Typing feature:
- Click “Window” from the menu bar at the very top.
- Select “Show Musical Typing.”

Alternatively, you can use Logic’s key command, which is “Command + K,” to quickly open and close Musical Typing.
Once you’re ready to record, click “R” on your track. It will turn red to indicate that you can record what you play when you press play.
With these three methods, you can create MIDI regions for your software instrument tracks. Moreover, Logic allows you to use another way to work with virtual sounds, and that’s via the step sequencer.
With Logic’s built-in step sequencer feature, you can create patterns and grooves for triggering certain notes. Though commonly used for drum machines, you can use it for any virtual instrument you want.
Here’s how you can create a step sequencer region for your virtual instrument track:
- Press “E” on your keyboard to open the Editor menu for your software instrument track.
- From the top-center section of the Editor window, switch the “Piano Roll” view to “Step Sequencer.”
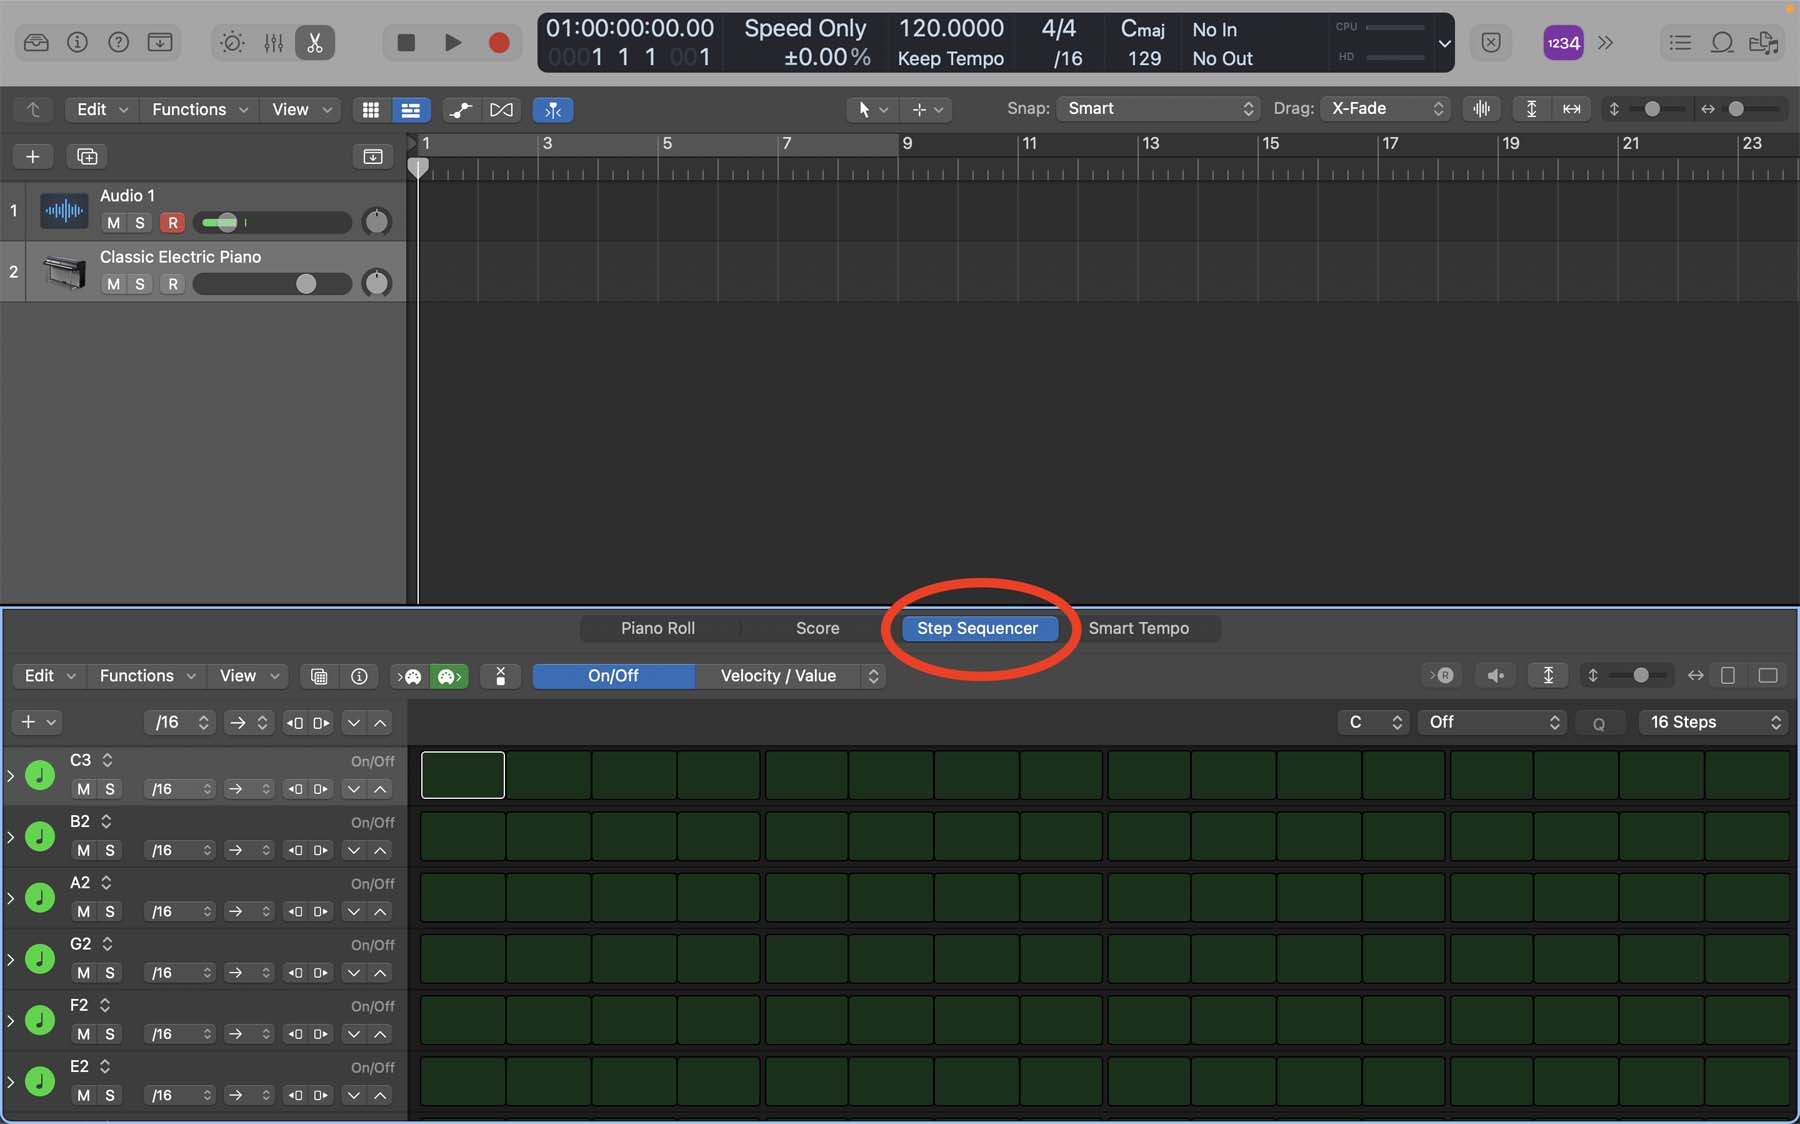
In another post, I have extensively covered everything you need to know to start using Logic’s Step Sequencer like a pro.
Changing Virtual Instrument And Using Presets
So far we’ve covered the basics of working with a virtual instrument. Now, let’s choose and shape the sound of our track. Again, there is more than one method of going at it.
The easy way is to find your desired sound from Logic’s extensive library. Logic offers countless ready-to-use and high-quality presets and sounds that you can use in your project. You can open the library by clicking on the button on the top-left of Logic’s workspace. Alternatively, you can press “Y” on your keyboard.
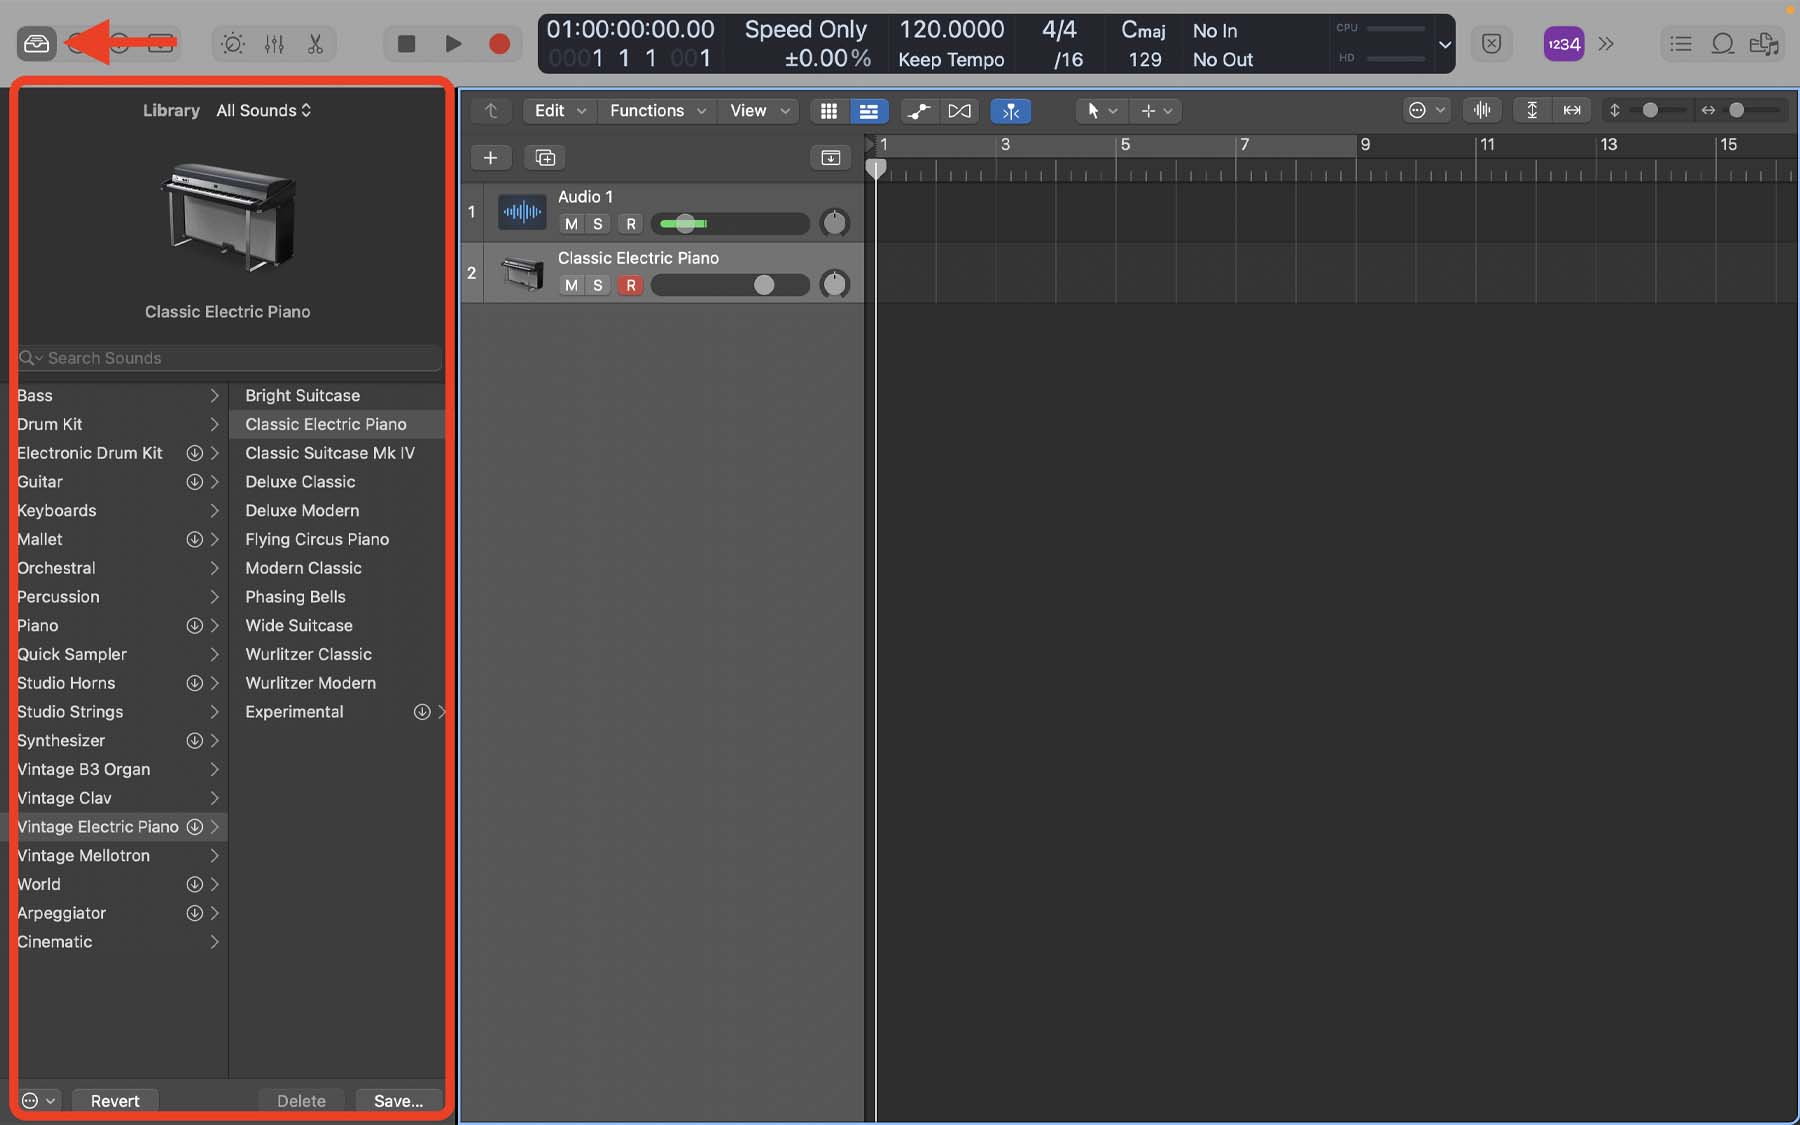
Anything from drums and other percussive instruments to synths, strings, and brass instruments are available in Logic’s library.
On the other hand, you can change the virtual instrument and tweak the details from scratch to create the sound you’re after. Here’s how you do it:
- Open the Inspector menu by pressing “I” on your keyboard.
- Click the right corner of the instrument slot (where it says E-Piano by default).
- Choose the software instrument you want.

It might be overwhelming to navigate through all of the options and land on what you’re looking for. Some of these instruments are more powerful than the others. For instance, Logic’s Drum Machine Designer is a fundamental tool for music production. You can use it to sample different sounds and create patterns with the step sequencer tool.
Another outstanding software instrument in Logic’s arsenal is the Alchemy. Alchemy is an advanced virtual synthesizer that allows you to manipulate sound in unique ways. I have a beginner’s guide for getting started with the basics of working with the Alchemy in Logic Pro.
Where To Go From Here
Getting familiar with and utilizing virtual instruments is a fundamental skill for all music producers. Learning the theory behind software instruments can be a good introduction, but make sure to try different sounds in your projects to develop an ear and taste for what sounds good.
Logic’s presets sound impressively good as stock plugins, so don’t be afraid of testing them out and integrating them into your songs if you stumbled upon something that suits the vibe of your track. Once you gain some experience, you can take your craft to the next level by installing third-party VSTs to Logic.
If you need more help with music production, mixing, mastering, and songwriting, I highly recommend downloading my Free 6 Pillars To Learn Logic Pro Fast guidebook.


