How To Fade Tracks In Logic Pro
Dec 02, 2021
In a perfect world, all tracks would blend together like a dream. However that's not the reality.
A lot of times we have to manually edit the tracks so that it's pleasant to our ears.
A common mistake among new producers is that they just put audio files together without fading the tracks. This could create pops or harsh sounds.
Today I am going to teach you 4 easy ways to create fades in Logic Pro X or simply just Logic Pro. If you are a GarageBand use then here is a great post on how to fade in GarageBand. Final note, if you prefer to learn how to fade in a video format then here is a video on how to fade in Logic Pro.
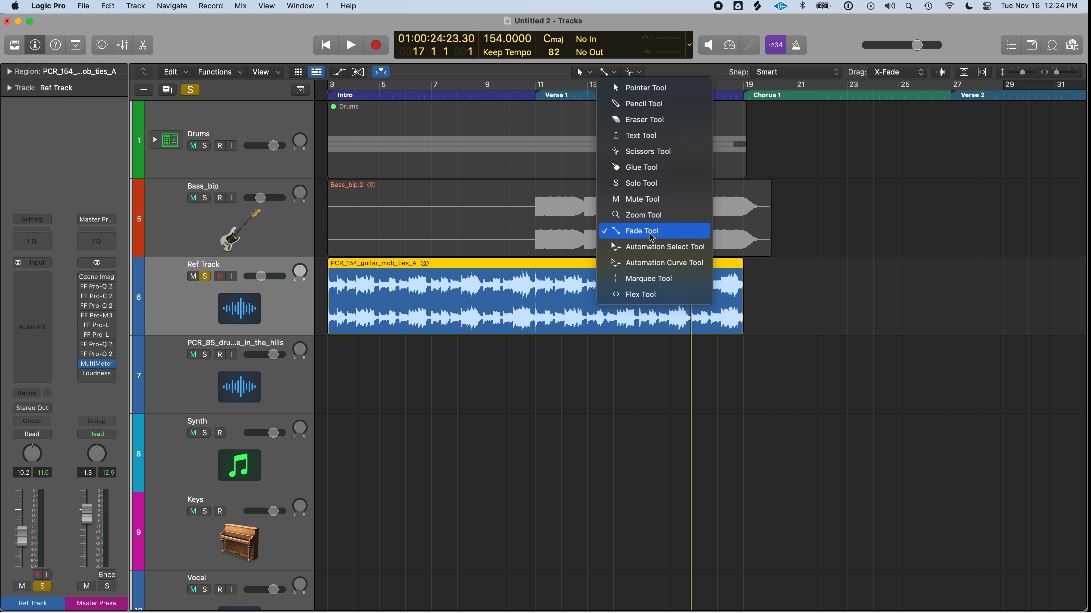
First, is to simply use your fade tool. Also, you should check out my free guide on learning Logic Pro Faster. You'll be a more in pro, in on time.
I normally add it to the command tool for easy access. Once it’s added in your command tool, all you have to do is hold the command button then create a selection on the region of choice, then a fade will automatically appear on the part of region where you selected.
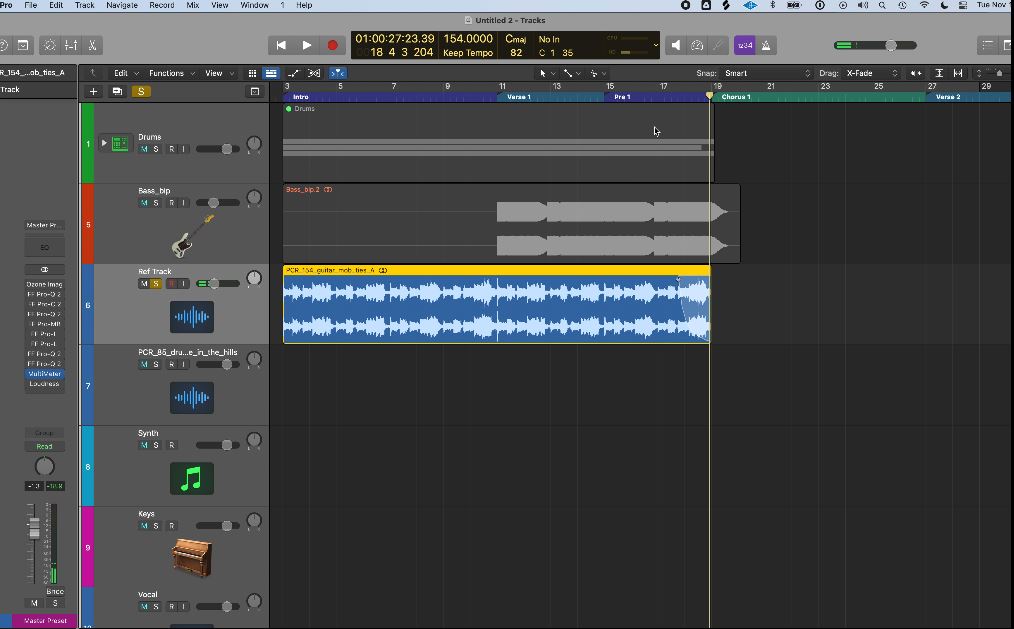
See the screenshot below where I fade the end of a guitar track. By the way, fades can also be created by naturally fading out while you record the guitar, often the best fades come from the player themselves. However, it's not always the base.
Afterwards you can edit the length of the fade.
You can make it as long as you want. However, it's not very popular to have a huge fade. If you wanted a huge fade then you could do this using automation. Short fades in the end would already be enough but then again that depends on your style.
Apart from that you can also make the fade have a certain curve.
All you have to do is select the middle part of the fade then play around with your cursor. You can edit it and make it look like a C or an inverted C. That way you manipulate the way the fade sounds depending on your project.
Another secret tip is to right click on the fade and choose either "speed up" or "slow down". This will change the speed of the fade and it gives an interesting sound as it changes the pitch while doing so. Try it out in one of your projects. This is more of a production technique in Logic Pro, however, I find myself using the "speed up" option if I'm looking to create an intro for my song.
There is always room for creativity even though it’s just a fade!
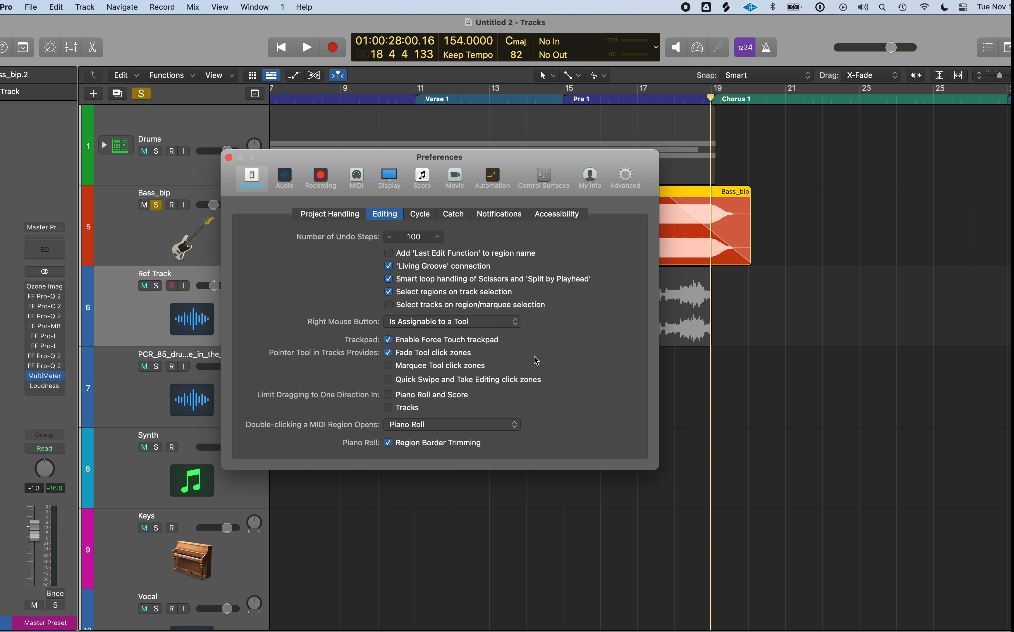
The second way to create a fade is to toggle on the edge of the region, just hover on top of the edge then the cursor icon will change and all you have to do is drag the icon to the desired length of the fade.
Normally, this would be a default setting, if not all you have to do is click on:
Logic Pro > Preferences > General > Editing
Then select the checkbox:
Pointer Tool Track Provides: Fade Tool Click Zones.
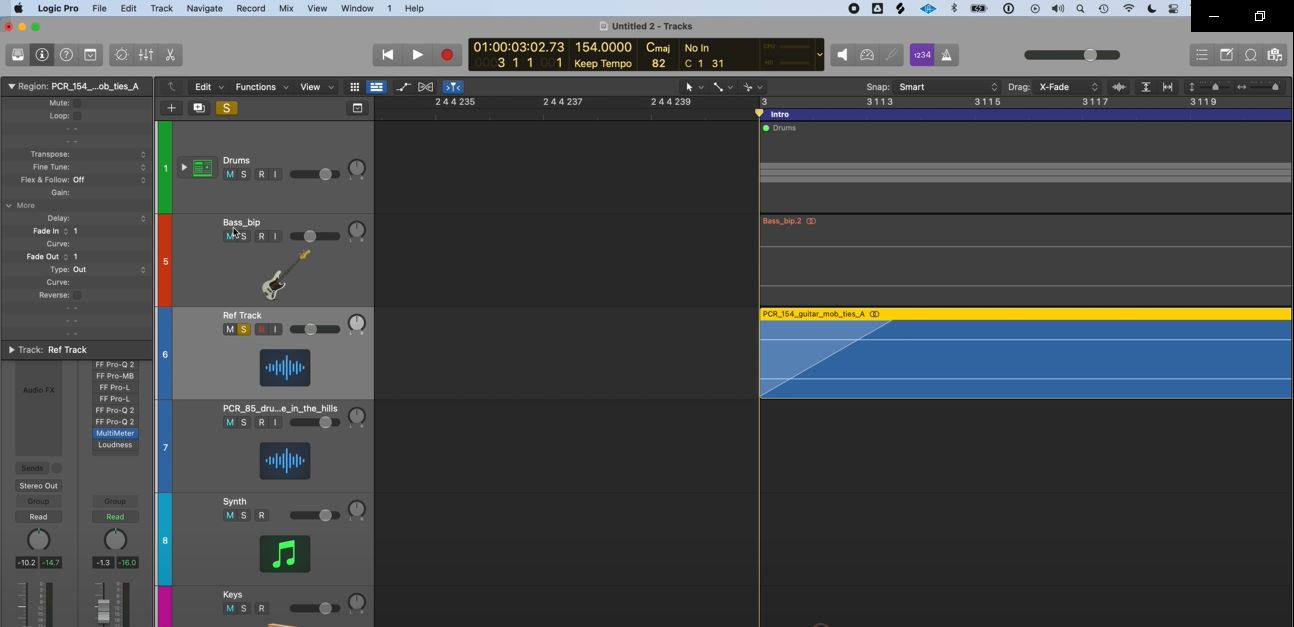
All the information regarding the fades are visible in the region editor. The third way to create the fades would be there.
Select your desired region, click on the region editor and input a number for the length of the fades. See screenshot below.
You can input any number you desire. However, if you enter zero the fade would disappear.
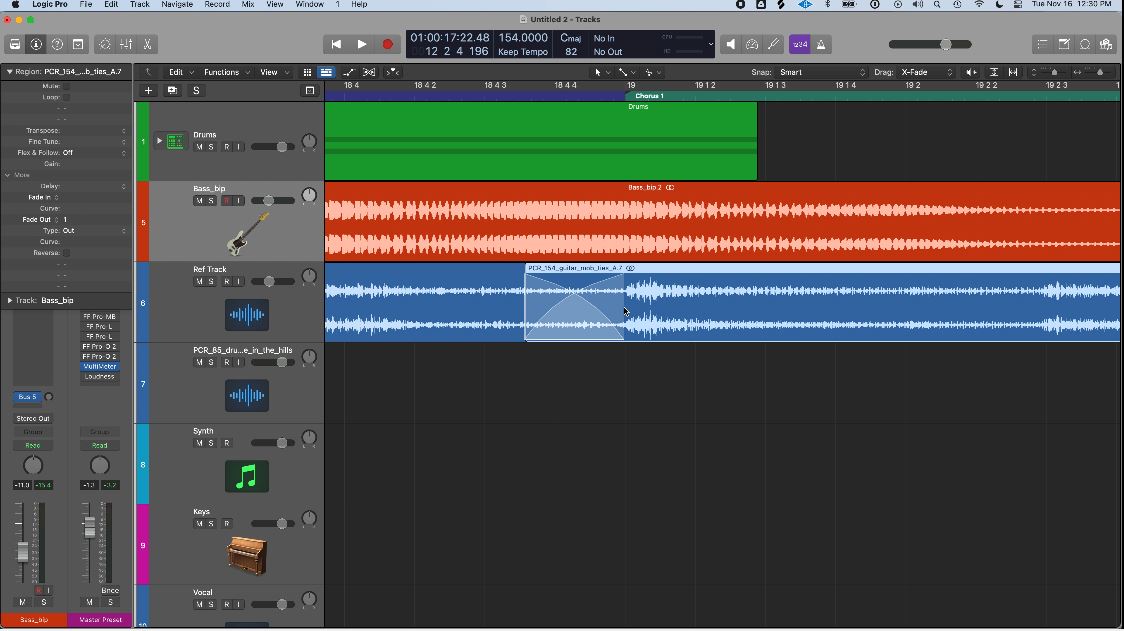
Furthermore, you can blend two tracks together by crossfading.
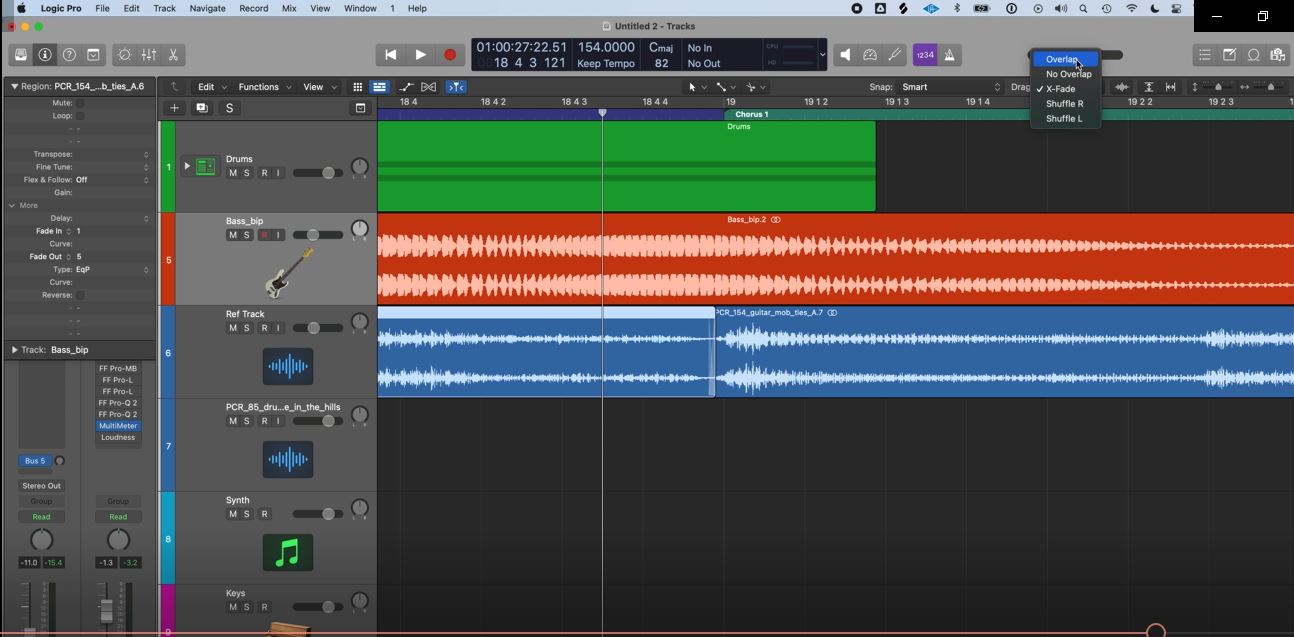
This would ensure that both tracks blend together seamlessly. Just click on the Drag dropdown and select X-fade. Once you stack the tracks on top of each other it would automatically create a crossfade in the region. You can drag the tracks for the desired length of the crossfade.

And that’s the four easy ways to create fades in Logic Pro.
You can use any methods you prefer as we all have unique editing styles. So, which method would you use everyday?
If you'd like to learn more about Logic Pro, music production, and songwriting then you would be interested in my 6 pillars on learning Logic Pro faster or let me know if you have any questions on my youtube channel.

